Layers
A canvas is made of layers that define the content.
These layers are listed is the dashboard.
Kinds of Layer
As you can see in the picture below, there are different kinds of layers.
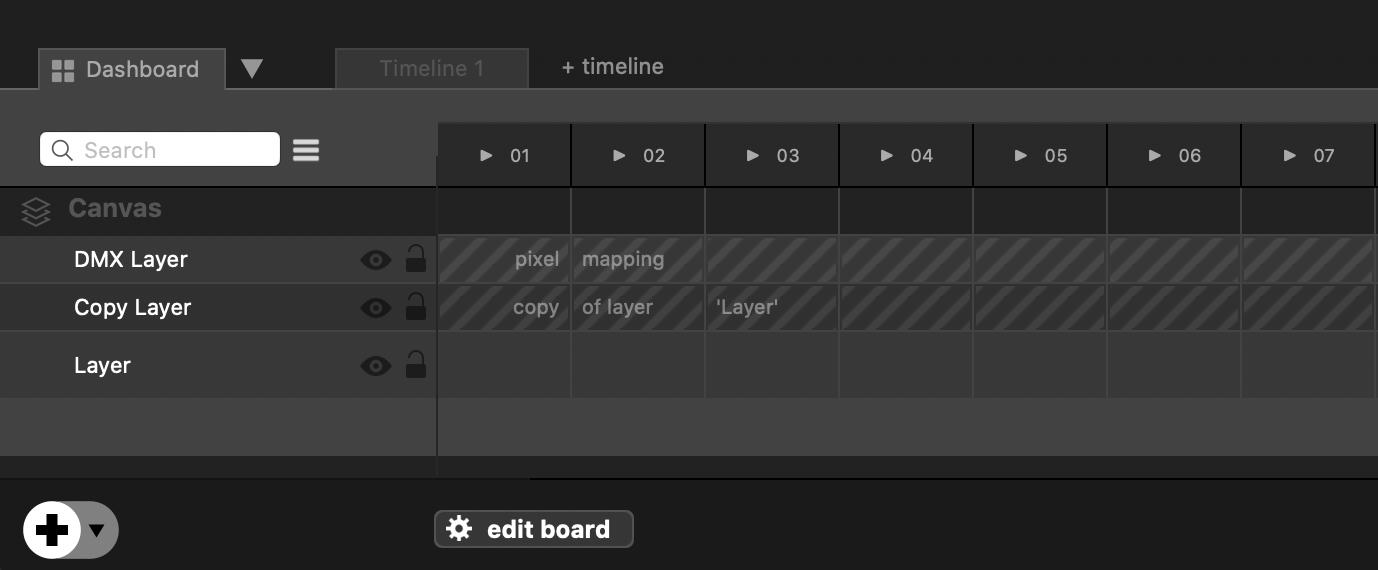
Media Layer
This is the default layer. When you create a new canvas, there is always one. In the above picture, it is the layer called “Layer”.Media-layers are made to play several media from library. Copy-layers and DMX-layers are meaningless if there is not at least one media-layer.
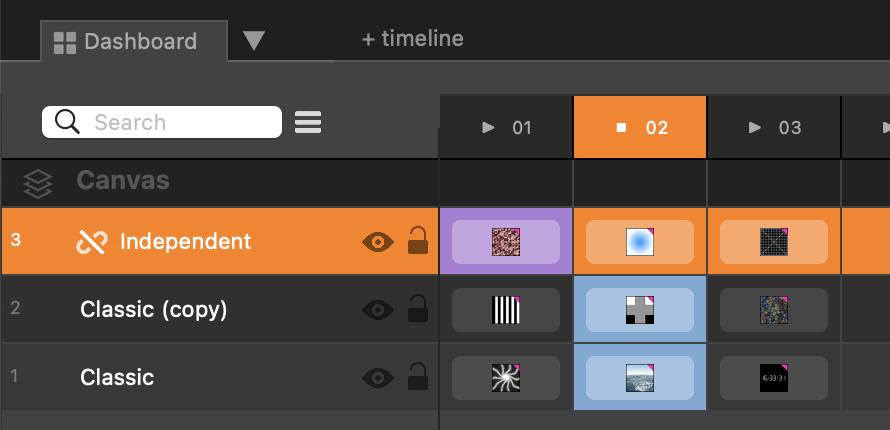
Independent Media Layer
This is a variation of the media-layer but it does not follow the columns in the dashboard. This may be very handy to manage content that is independent, such as cameras or background movies.
Other than that, this kind of layer behaves exactly the same as classic media-layer (you can add a media-transition for example).
To understand the difference, open this project then press A, B or C on your keyboard :
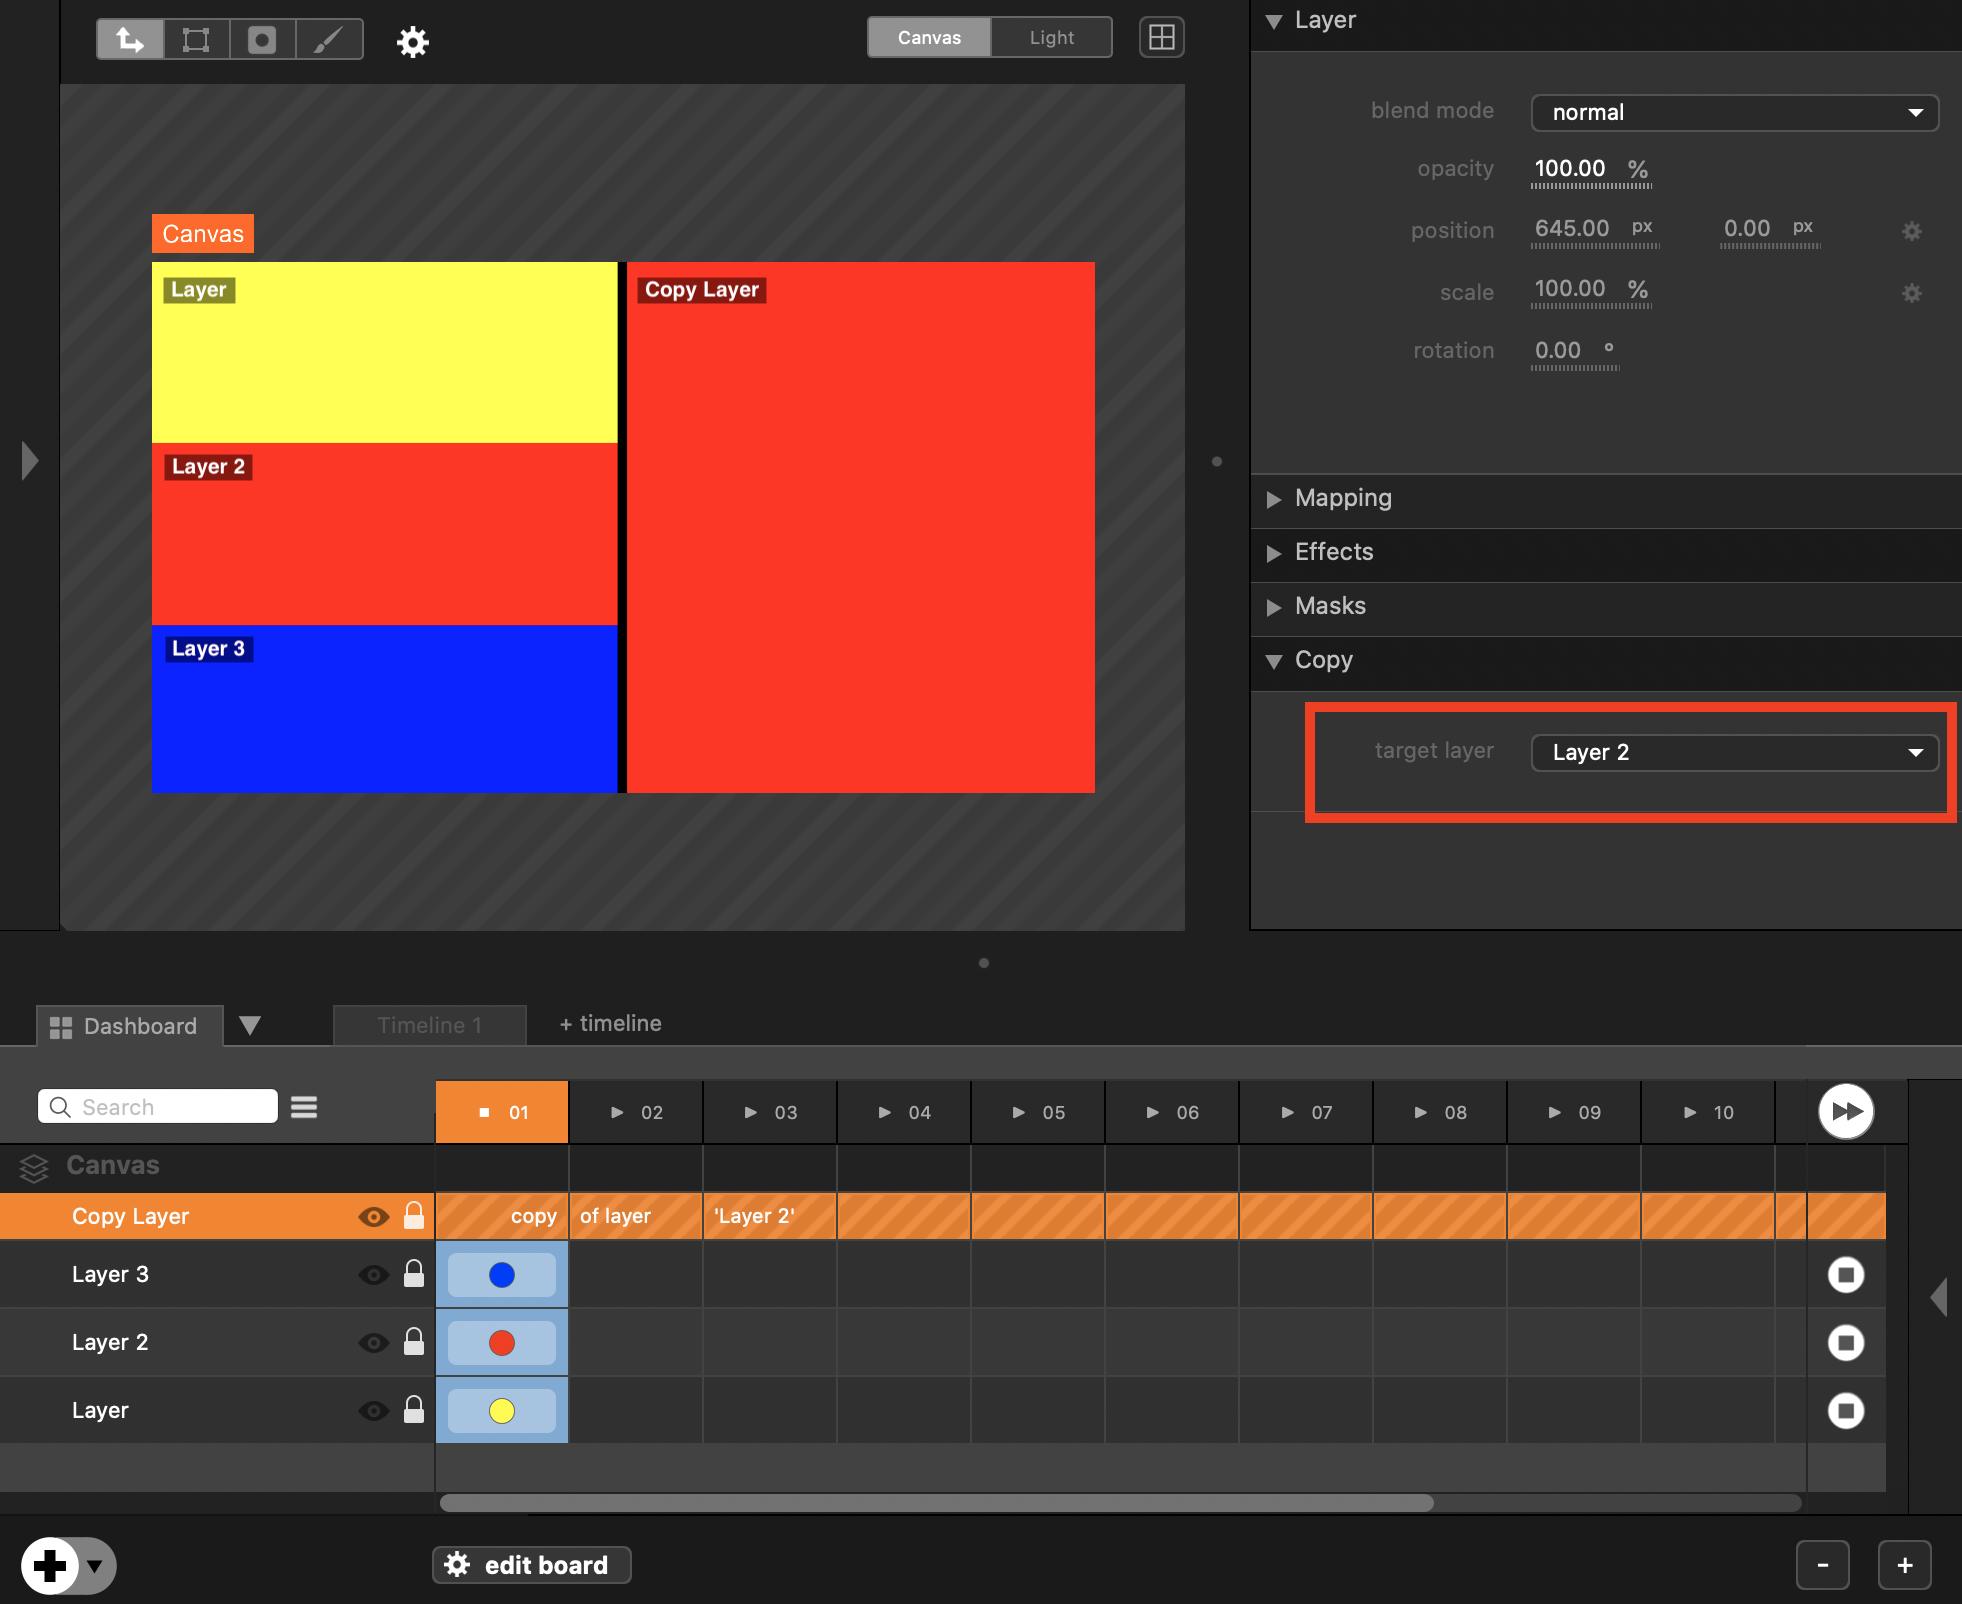
Copy Layer
A copy-layer purpose is to continuously copy content of another layer. When you create a slice from the slice-editor, it always create such a layer.
Thus, the image from the targeted layer are used in copy-layer. However, both layers still have their own properties, such as mapping, masks or effects.
The target layer can be chosen in properties-view :
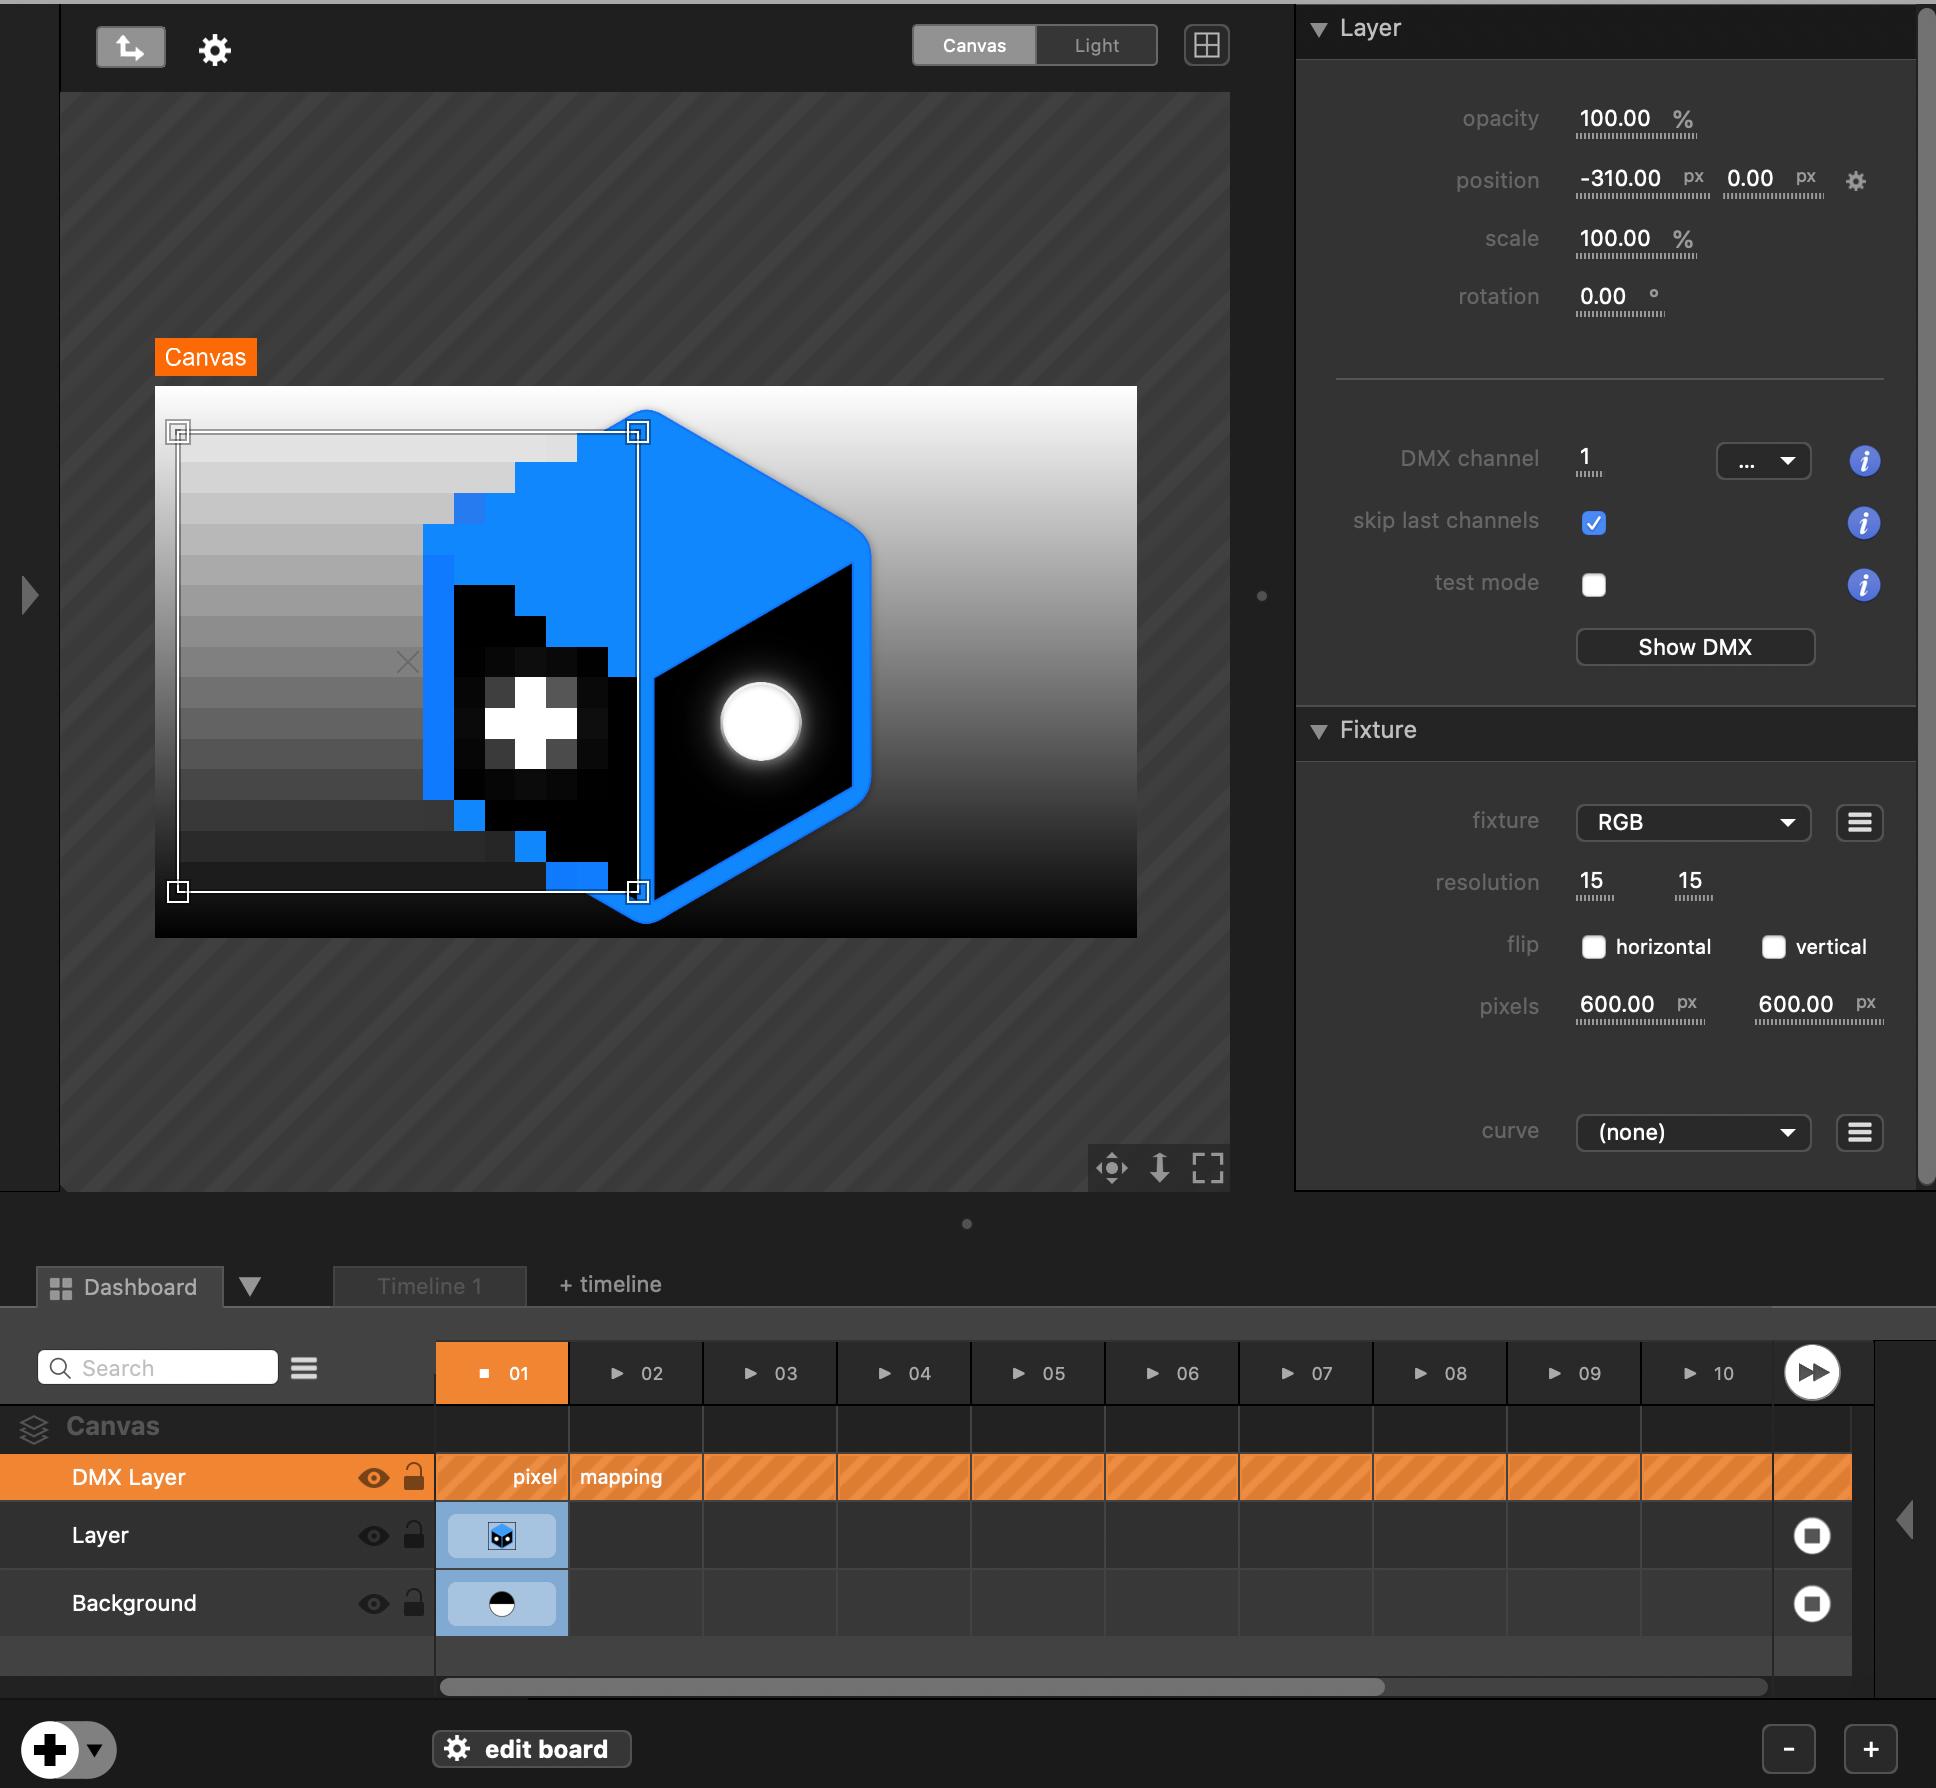
DMX Layer
A DMX-layer transforms pixels into DMX data for lights or LED.
A DMX-layer will always be on top of the layer list. It uses the layers below to generate its content.
Learn more about LED Mapping in this section : LED Mapping
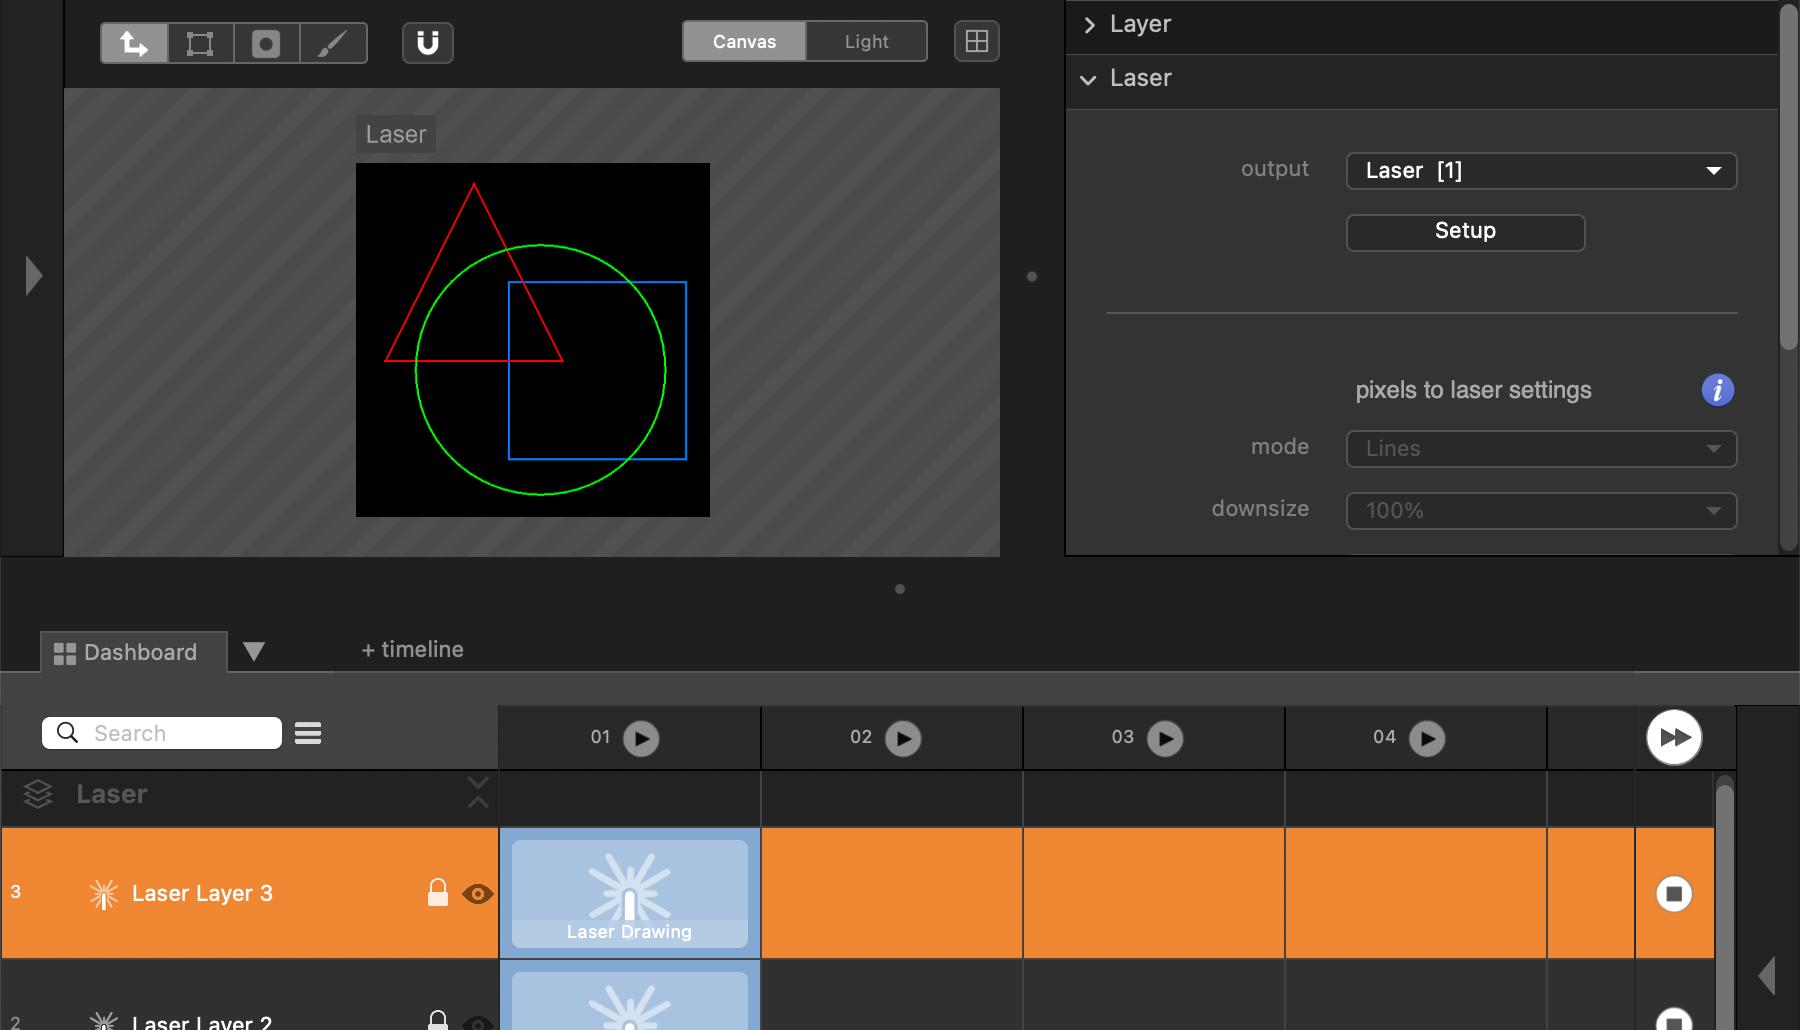
Laser Layer
A laser-layer transforms pixels into ILDA data for laser devices.
Learn more about lasers in this section : Laser
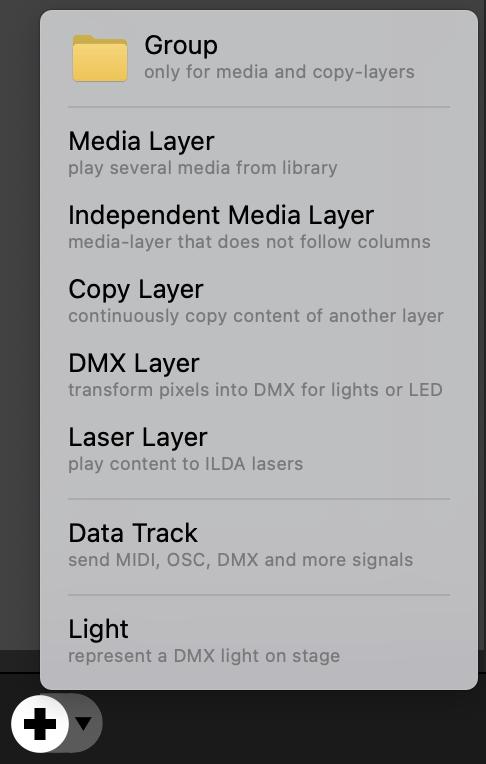
Group
You can arrange several media-layers or copy-layers inside a group.
A group can modify the rendering as it has its own blend-mode, opacity and effects, which therefore apply to all the layers contained.

Manage layer list
Add a layer
To add a media-layer, just click on the + button, below the list of layers (or press CMD+L).
To choose another kind of layer, click on the triangle icon next to the + button. Select the kind of layer you want from this list :
Copy and paste a layer
Copy and paste works for layers. It copies the kind of the layer and all its medias and properties.
Use ⌘C and ⌘V shortcuts, or ⌘D to duplicate.
Reorganize
To move a layer from the list, just drag it to the wanted position. You can move a layer to another canvas or a group.
Keep in mind that the DMX-layers will always be on top.
Remove
To delete a layer, just press ⌫. If you think this is too easy, you can uncheck the option Allow ⌫ alone to Delete from the Edit menubar, so CMD+⌫ will be required to delete a layer.
⚠️ If you just want to remove a media, be sure you clicked on media/columns first. Otherwise you will remove the whole layer.
Edit a single layer
From the properties-view
Click to select a layer : its properties appear in the properties-view.
We will only cover the first Layer section here. But from there, it is also possible to map your layer, apply some effects or masks.
Learn about Mapping in this section : Mapping
Learn about Effects in this section : Effects
Learn about Masks in this section : Masks
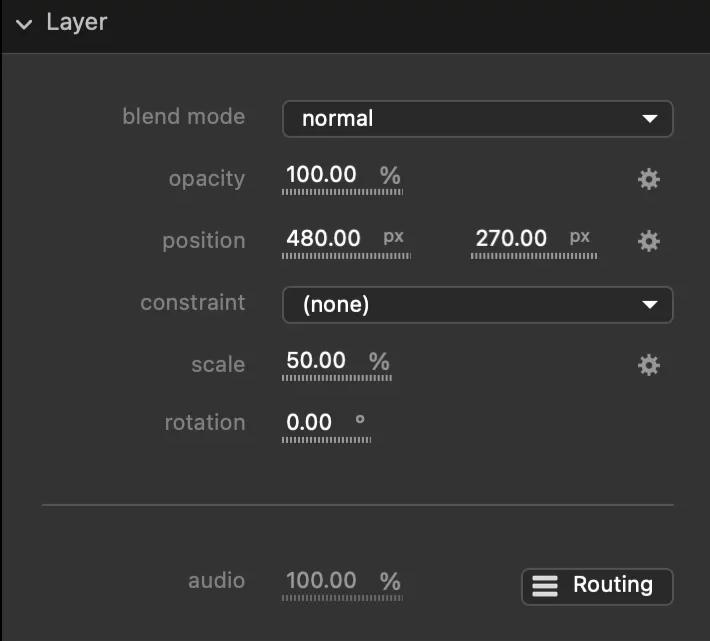
Layer properties are :
- blend mode
Affects the compositing of this layer with the layers below.
If there is no layer below, the blending mode has no effect.
Default value is normal.
This property is only available for a Media Layer, a Copy Layer or a Group.
- opacity
Affect the transparency of the layer as well as the volume of the audio.
- 100% : layer is opaque, audio volume is 100%. Default value.
- 50% : layer is 50% transparent, audio volume is also 50%.
- 0% : layer is transparent, audio is mute. Nothing happens, acts as if no media.
If you do not want to affect the audio with the opacity : click thegearicon to changeaudio-volume follows opacitysetting.
- position
Change the position of the layer in the canvas.
Position also depends on anchor and workspace origin. The layer anchor can be changed by clicking in thegearat the right of the position parameter. Change Workspace origin from here or in Preferences as well.
Using default values :
Default anchor value is Center. Default Workspace origin is Center.
Default Layer position is 0px 0px. With default anchor and default workspace, it means layer is in the center of the canvas.
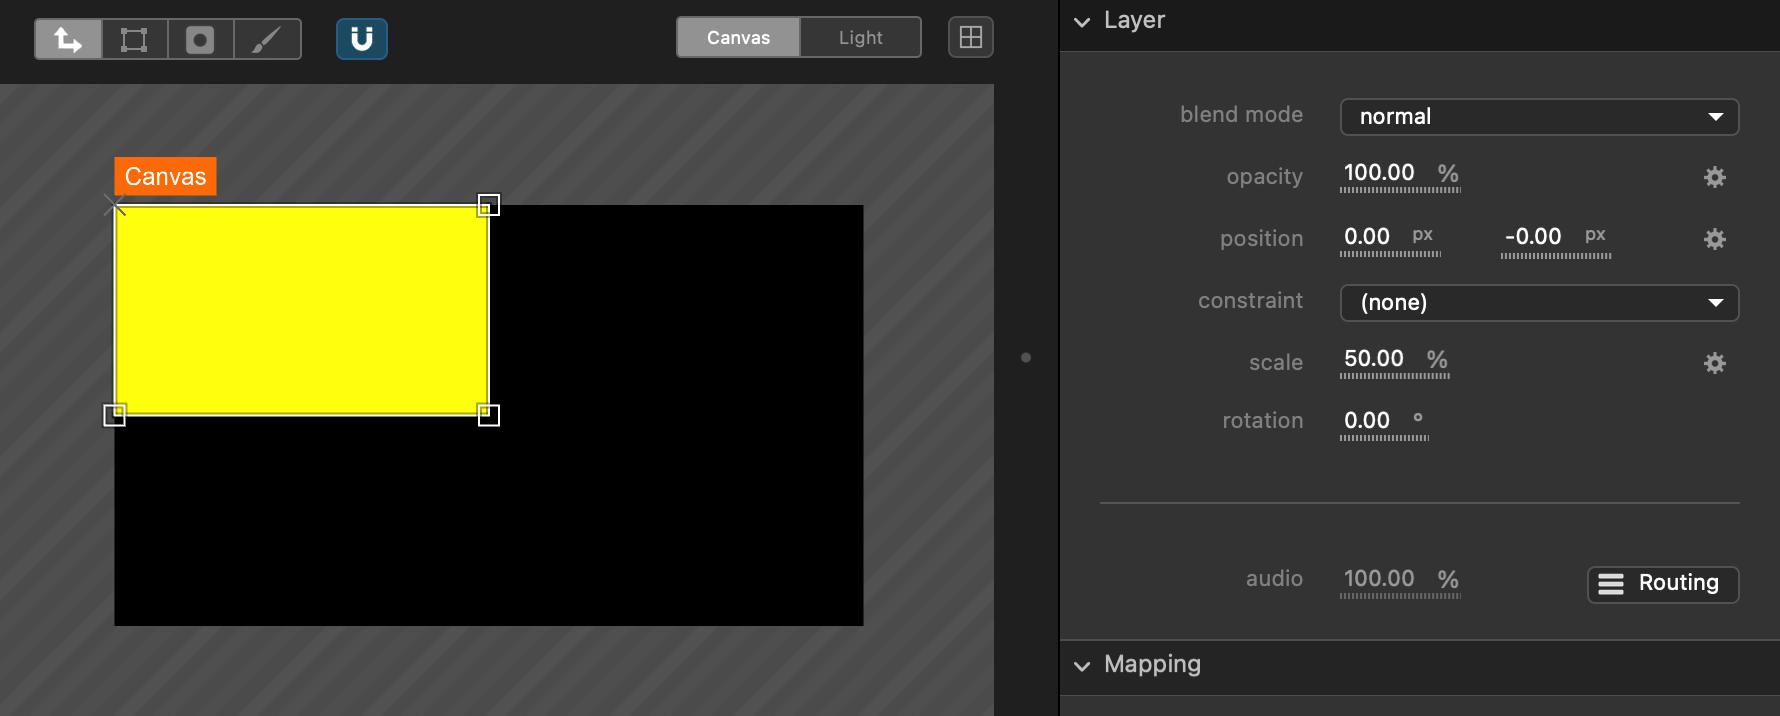
Using top-left anchor and top-left workspace origin :
The layer anchor is indicated by a cross. In the following picture, the top-left corner is a cross, this corner cannot be used for scaling or rotation.
In this example, the layer position is 0px 0px means the layer is located at top-left corner in the canvas.![]()
- constraint and scale
Affects the layer's media scale. Depending of the constraint, media may be cropped. The
scaleproperty depends of theconstraintproperty.There are 6 types of constraints.
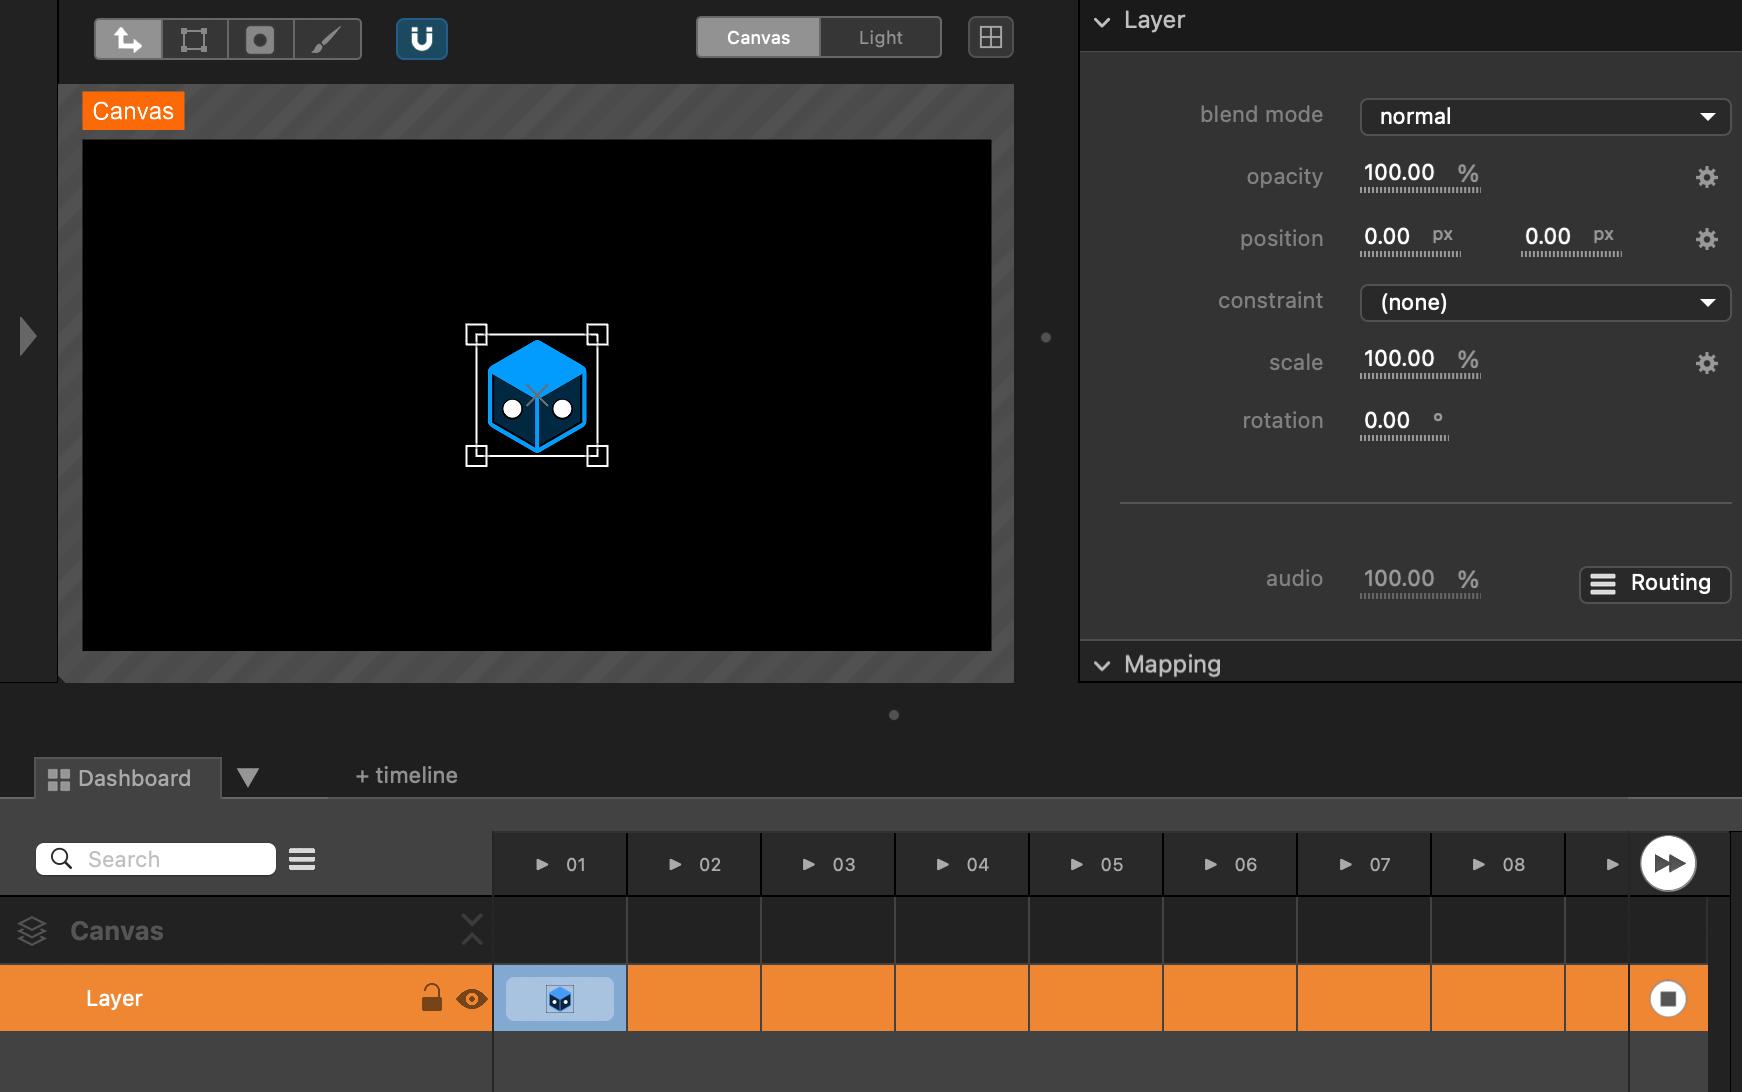
- (none) : no constraints are applied. Each media has its own size and ratio. Default value.
The scale at 100% corresponds to the actual size of the media.![]()
- a
separate X/Ysetting is available by clicking on thegearnext to the scale property.
By default, the media ratio is preserved. Separate X/Y allows you to use a different scale horizontally and vertically.
Only available if there is no constraint on the layer.
Scale uses layer anchor. Anchor point is not affected by scale.
- a
- Normalize to Canvas Size : media fit to the size of the canvas without cropping. Media size depends on canvas size.
The media fits the canvas when scale is 100%.![]()
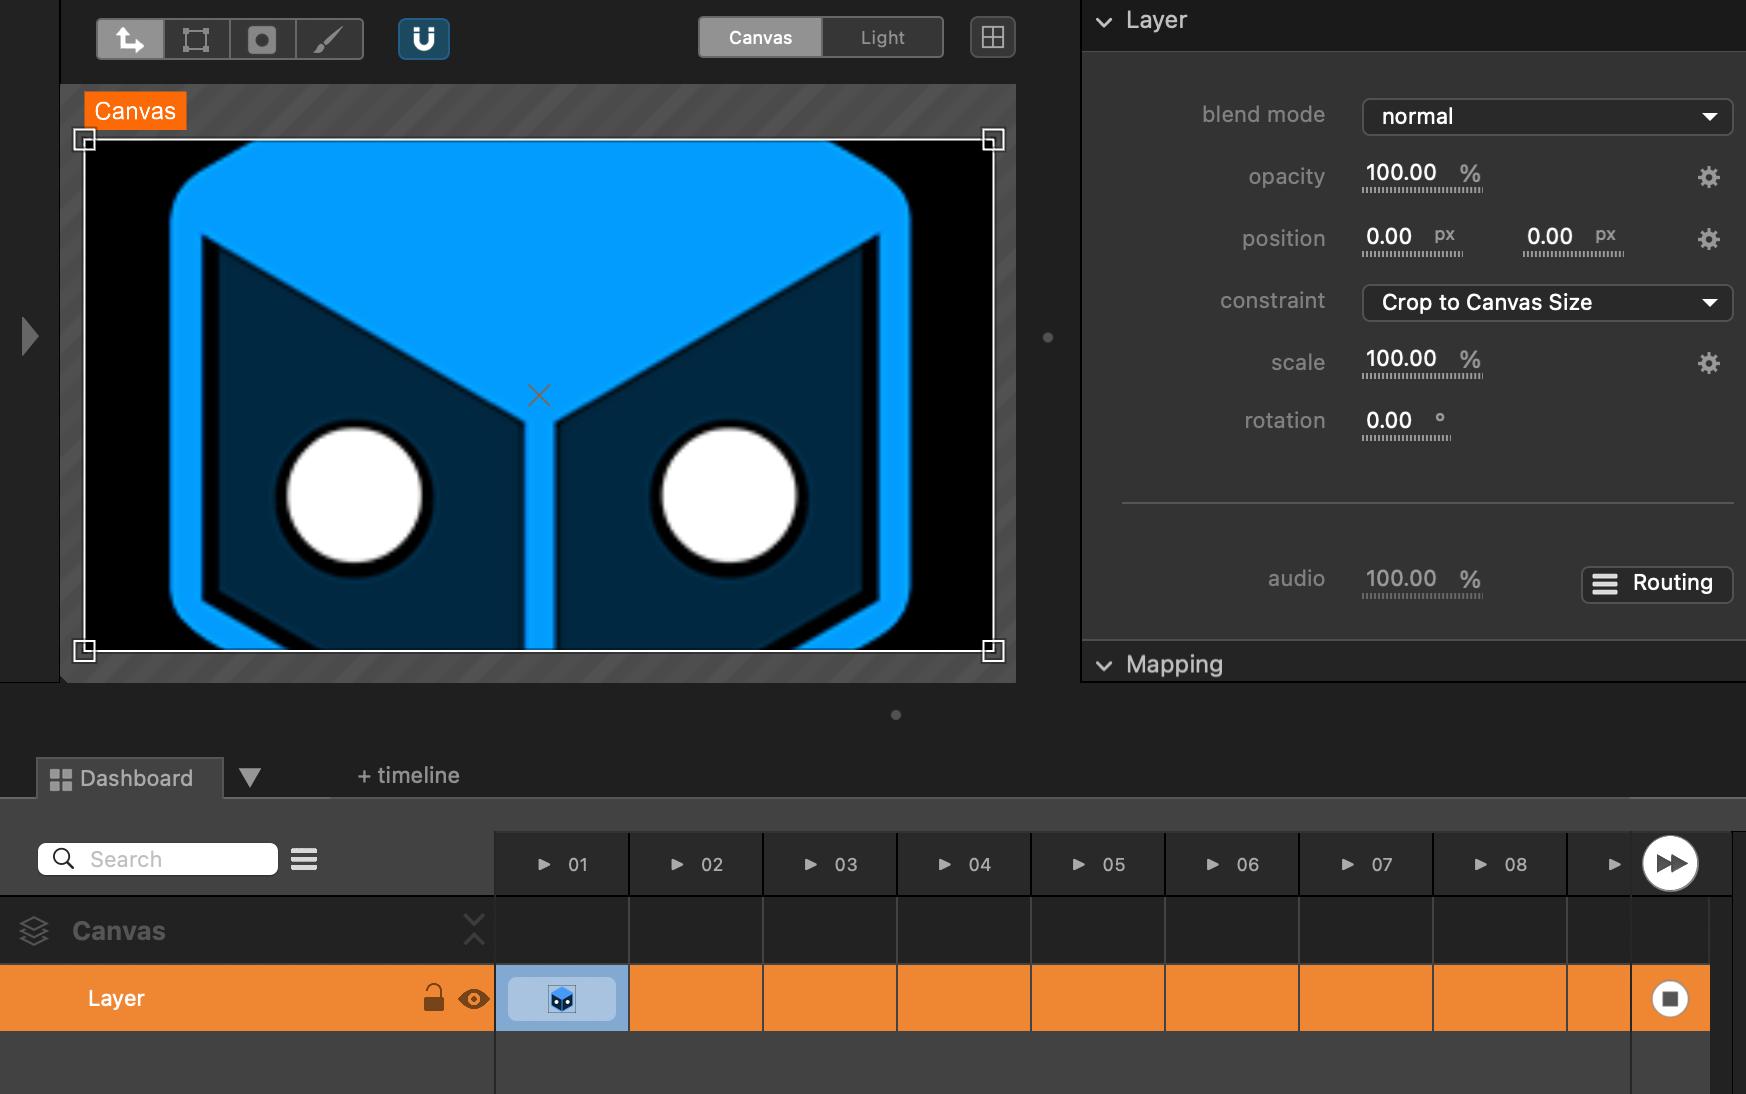
- Crop to Canvas Size : media fill to the size of the canvas by cropping it. Media size depends on canvas size.
The media fills the canvas when scale is 100%.![]()
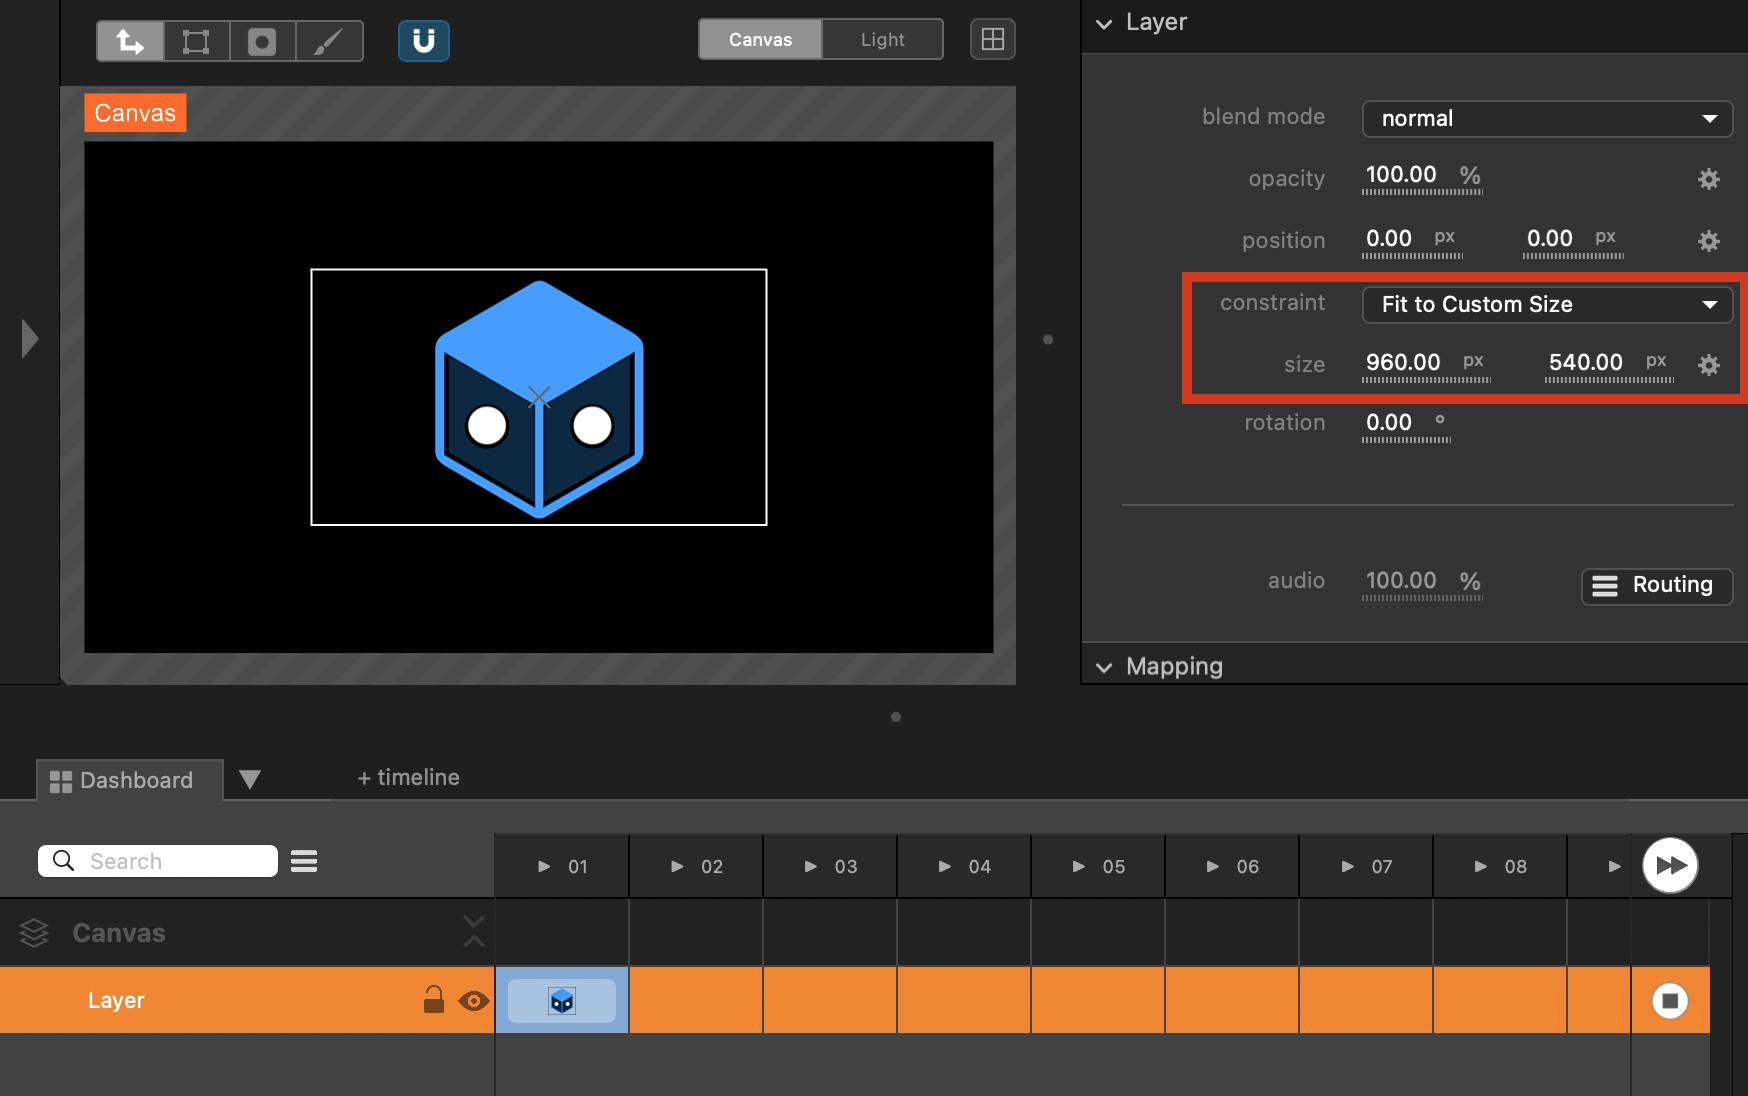
- Fit to Custom Size : the media fits to the custom size defined in the
sizeparameter.![]()
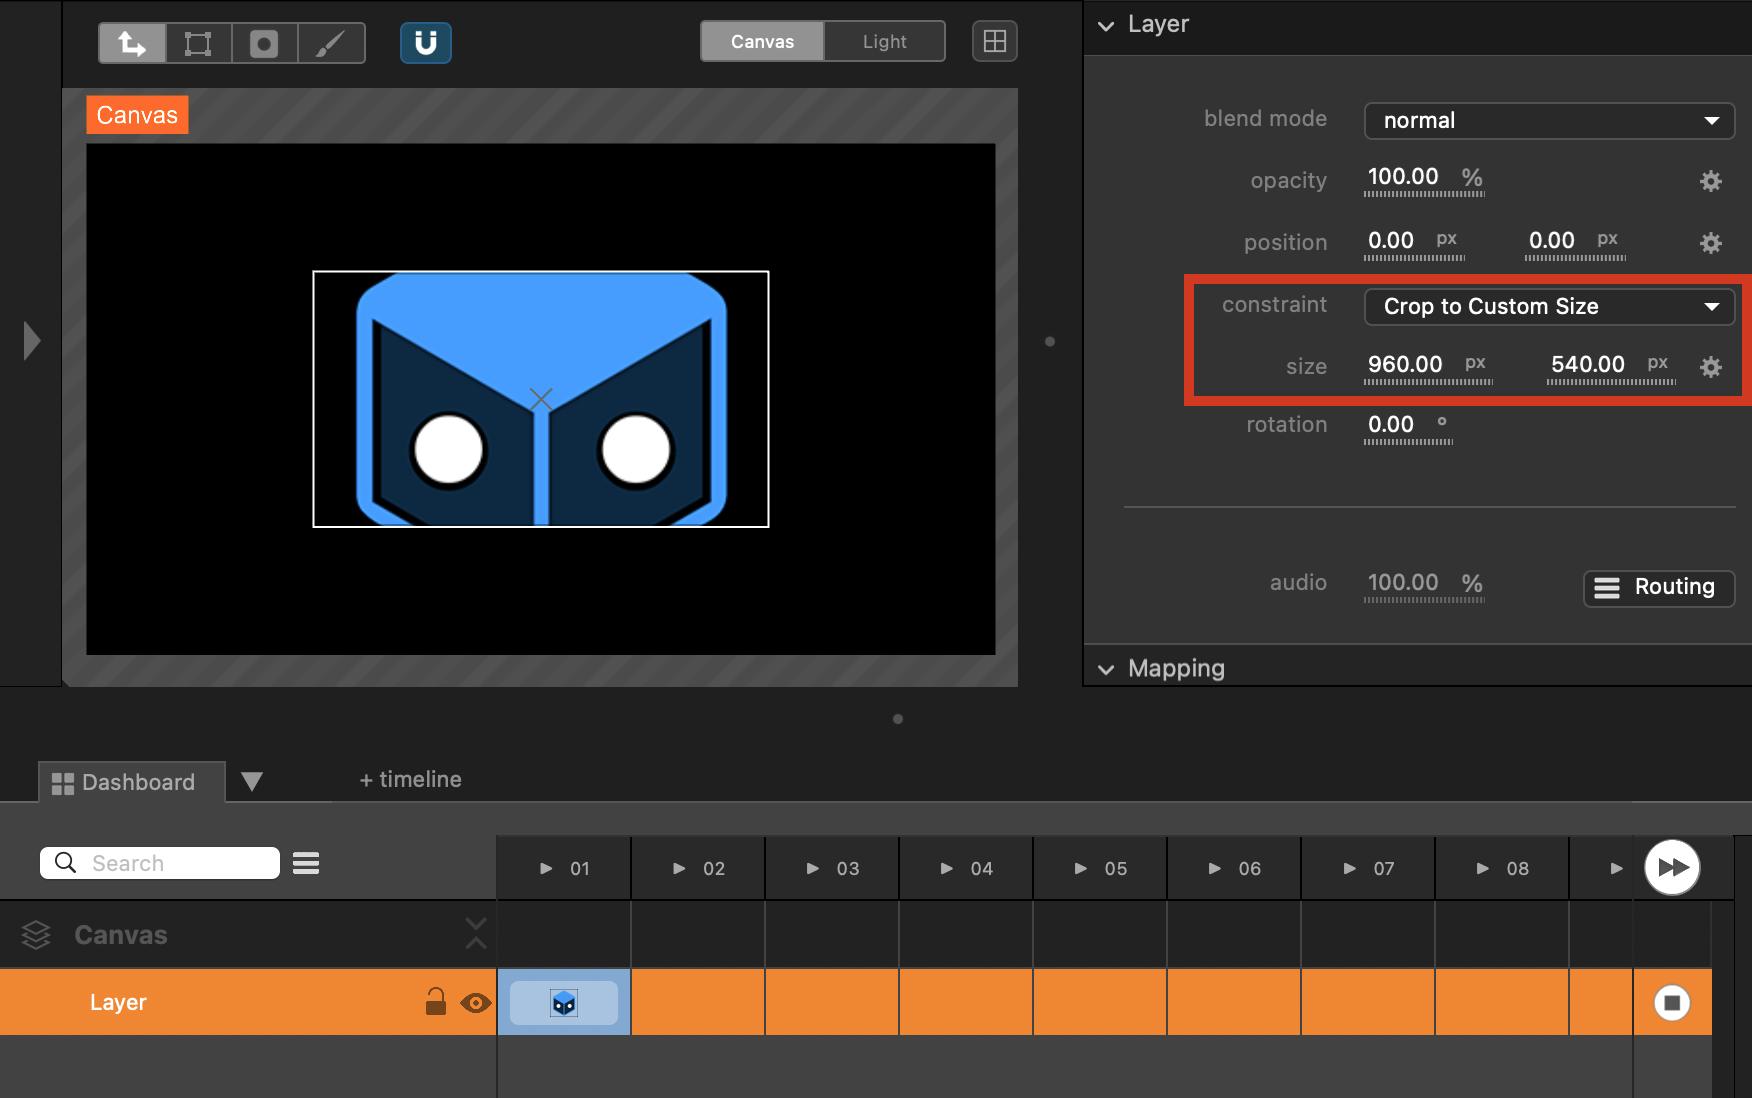
- Crop to Custom Size : the media fills to the custom size set in the
sizeparameter by cropping it.![]()
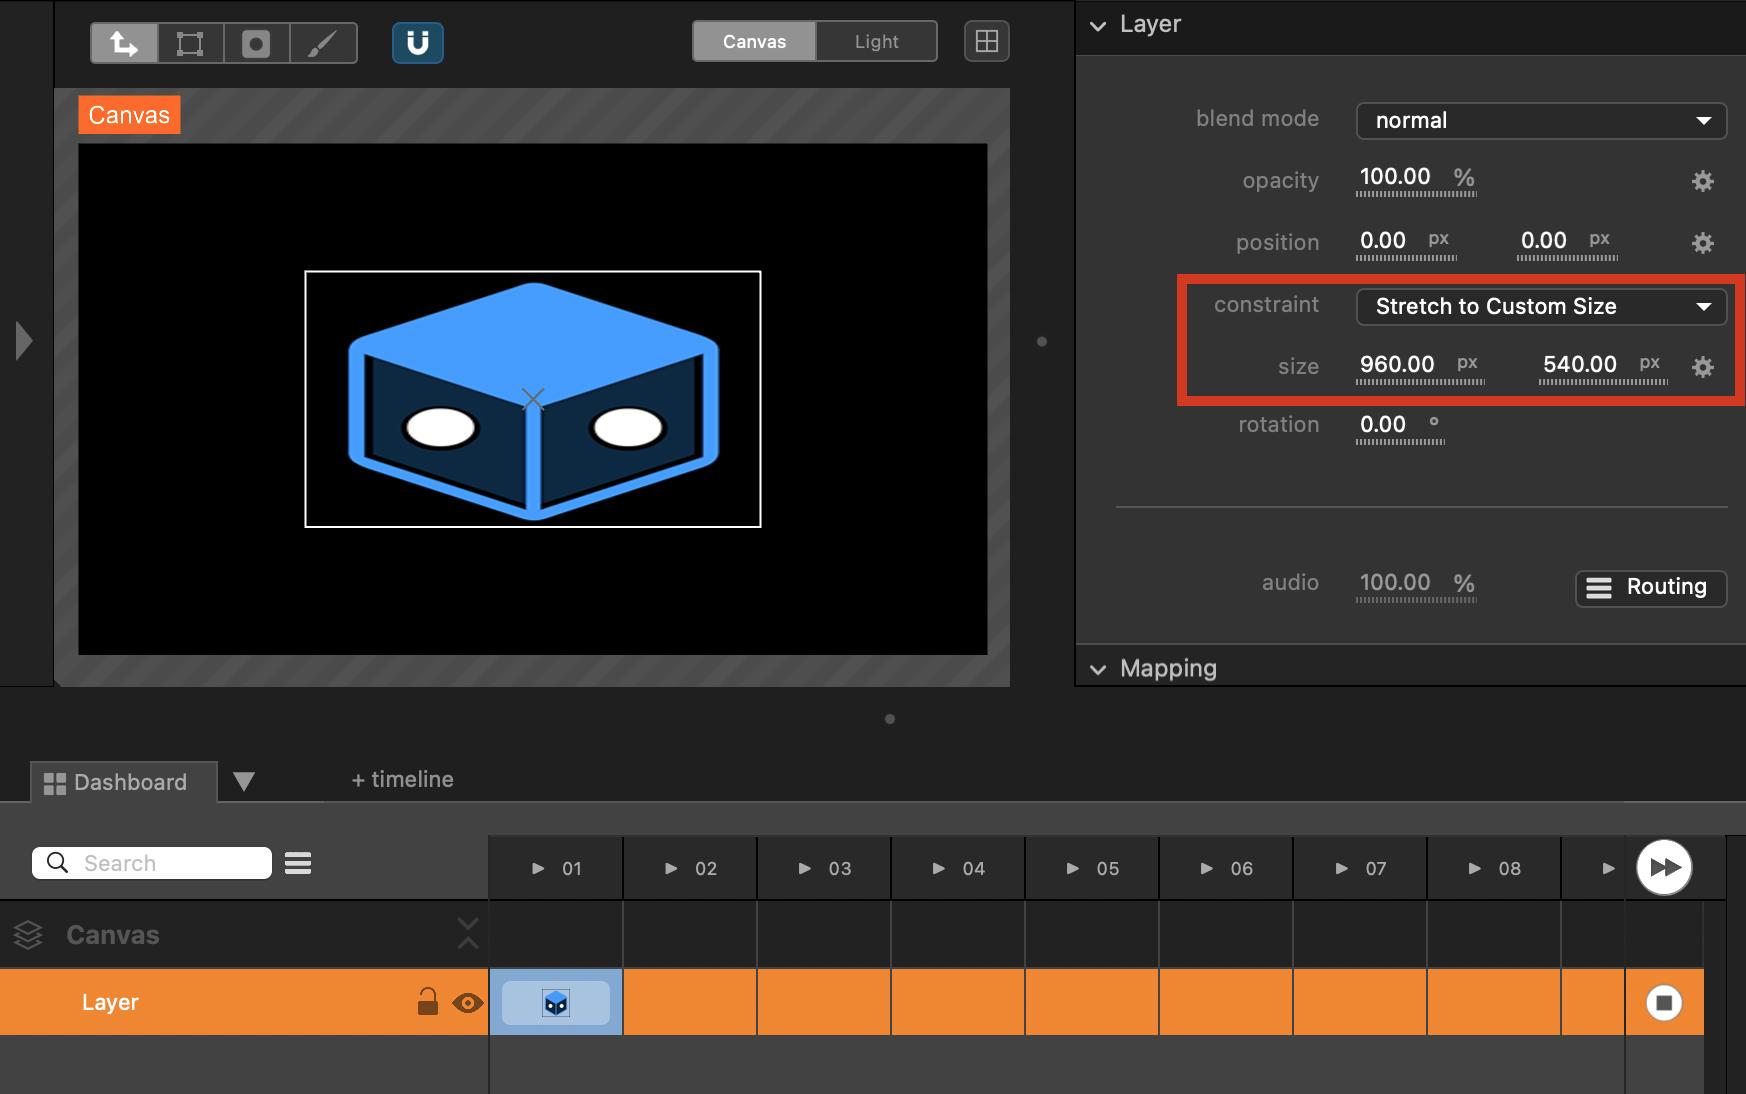
- Stretch to Custom Size : the media fills to the custom size set in the
sizeparameter by stretching it.![]()
- (none) : no constraints are applied. Each media has its own size and ratio. Default value.

- rotation
Apply a rotation on the layer.
0° : no rotation. Default value.
90° : layer is turned to the side.
180° : layer is upside down.
Rotation origin is layer anchor. Anchor point is not affected by rotation.
Default anchor is at center. Change it by clicking on the gear next topositionproperty.
From the dashboard
Some properties are editable from the dashboard.

- Rename a layer by double-clicking on its name
- Make your layer visible or hidden by clicking on the
eyeicon (it also mutes the audio and auto-go medias) - Lock or unlock your layer by clicking on the
padlockicon. When locked, a layer cannot be moved, scaled, rotated or mapped.
Edit medias and columns
After clicking on media/columns, layer properties can be set column by column.
This mode allows you to edit columns and to animate properties for each column.
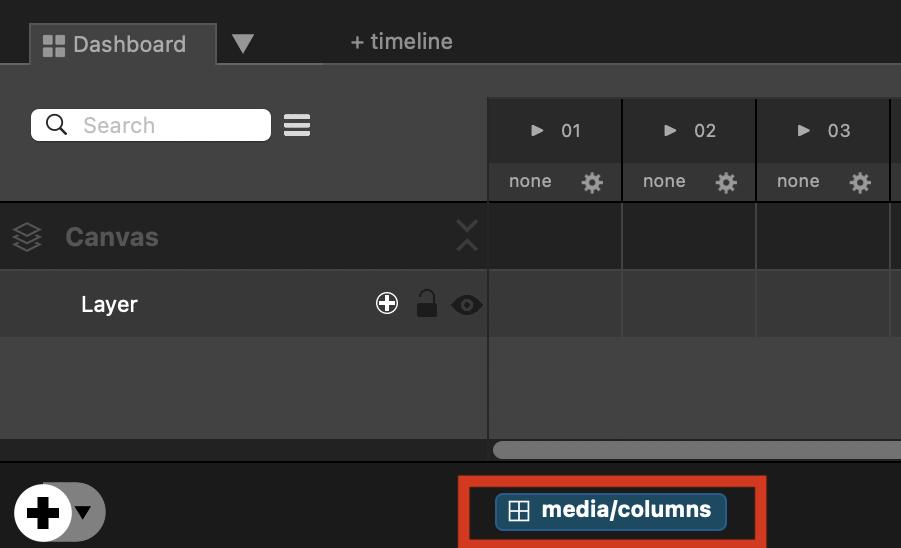
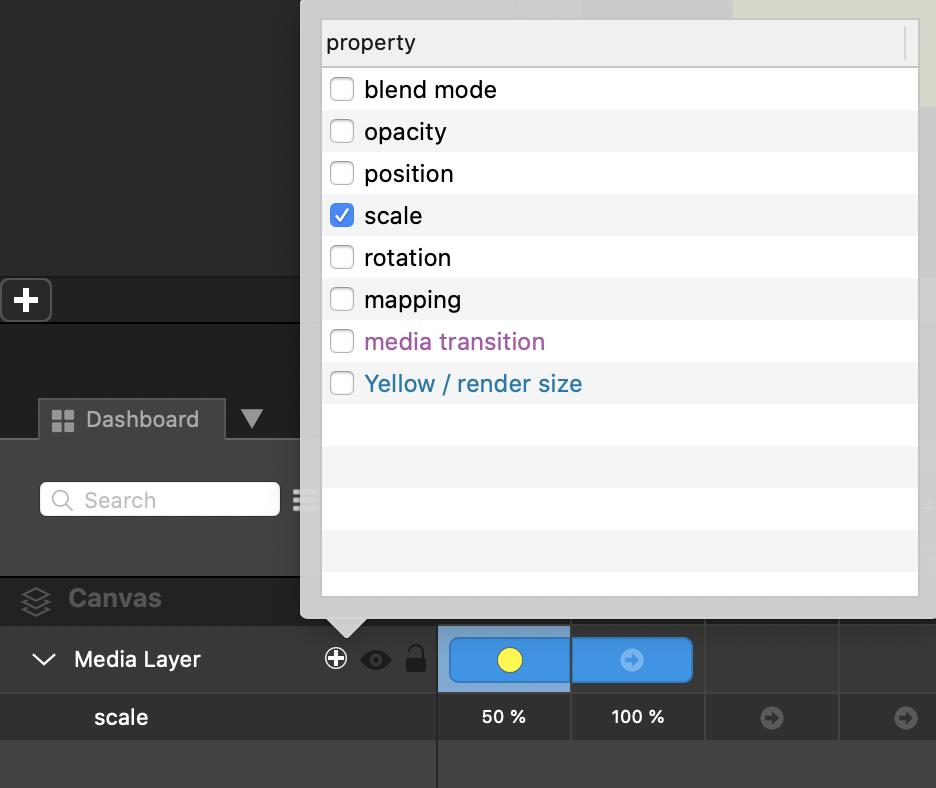
See the editable properties by clicking on the +, next to layer name. In the picture below, the media-layer scale will be 50% in the first column and 100% from the second column :
Learn more info in the dedicated article : Animate
Edit several layers
It is possible to edit several layers at the same time using multiple selection.
To select multiple layers :
- click on a layer, maintain
SHIFTand click on another layer in the list. All layers between these will be selected. - click on a layer, maintain
SHIFTand click on another layer in the workspace. Only these two layers will be selected. Repeat this operation to select more layers.
Multi-selection allows you to arrange layers in the workspace :
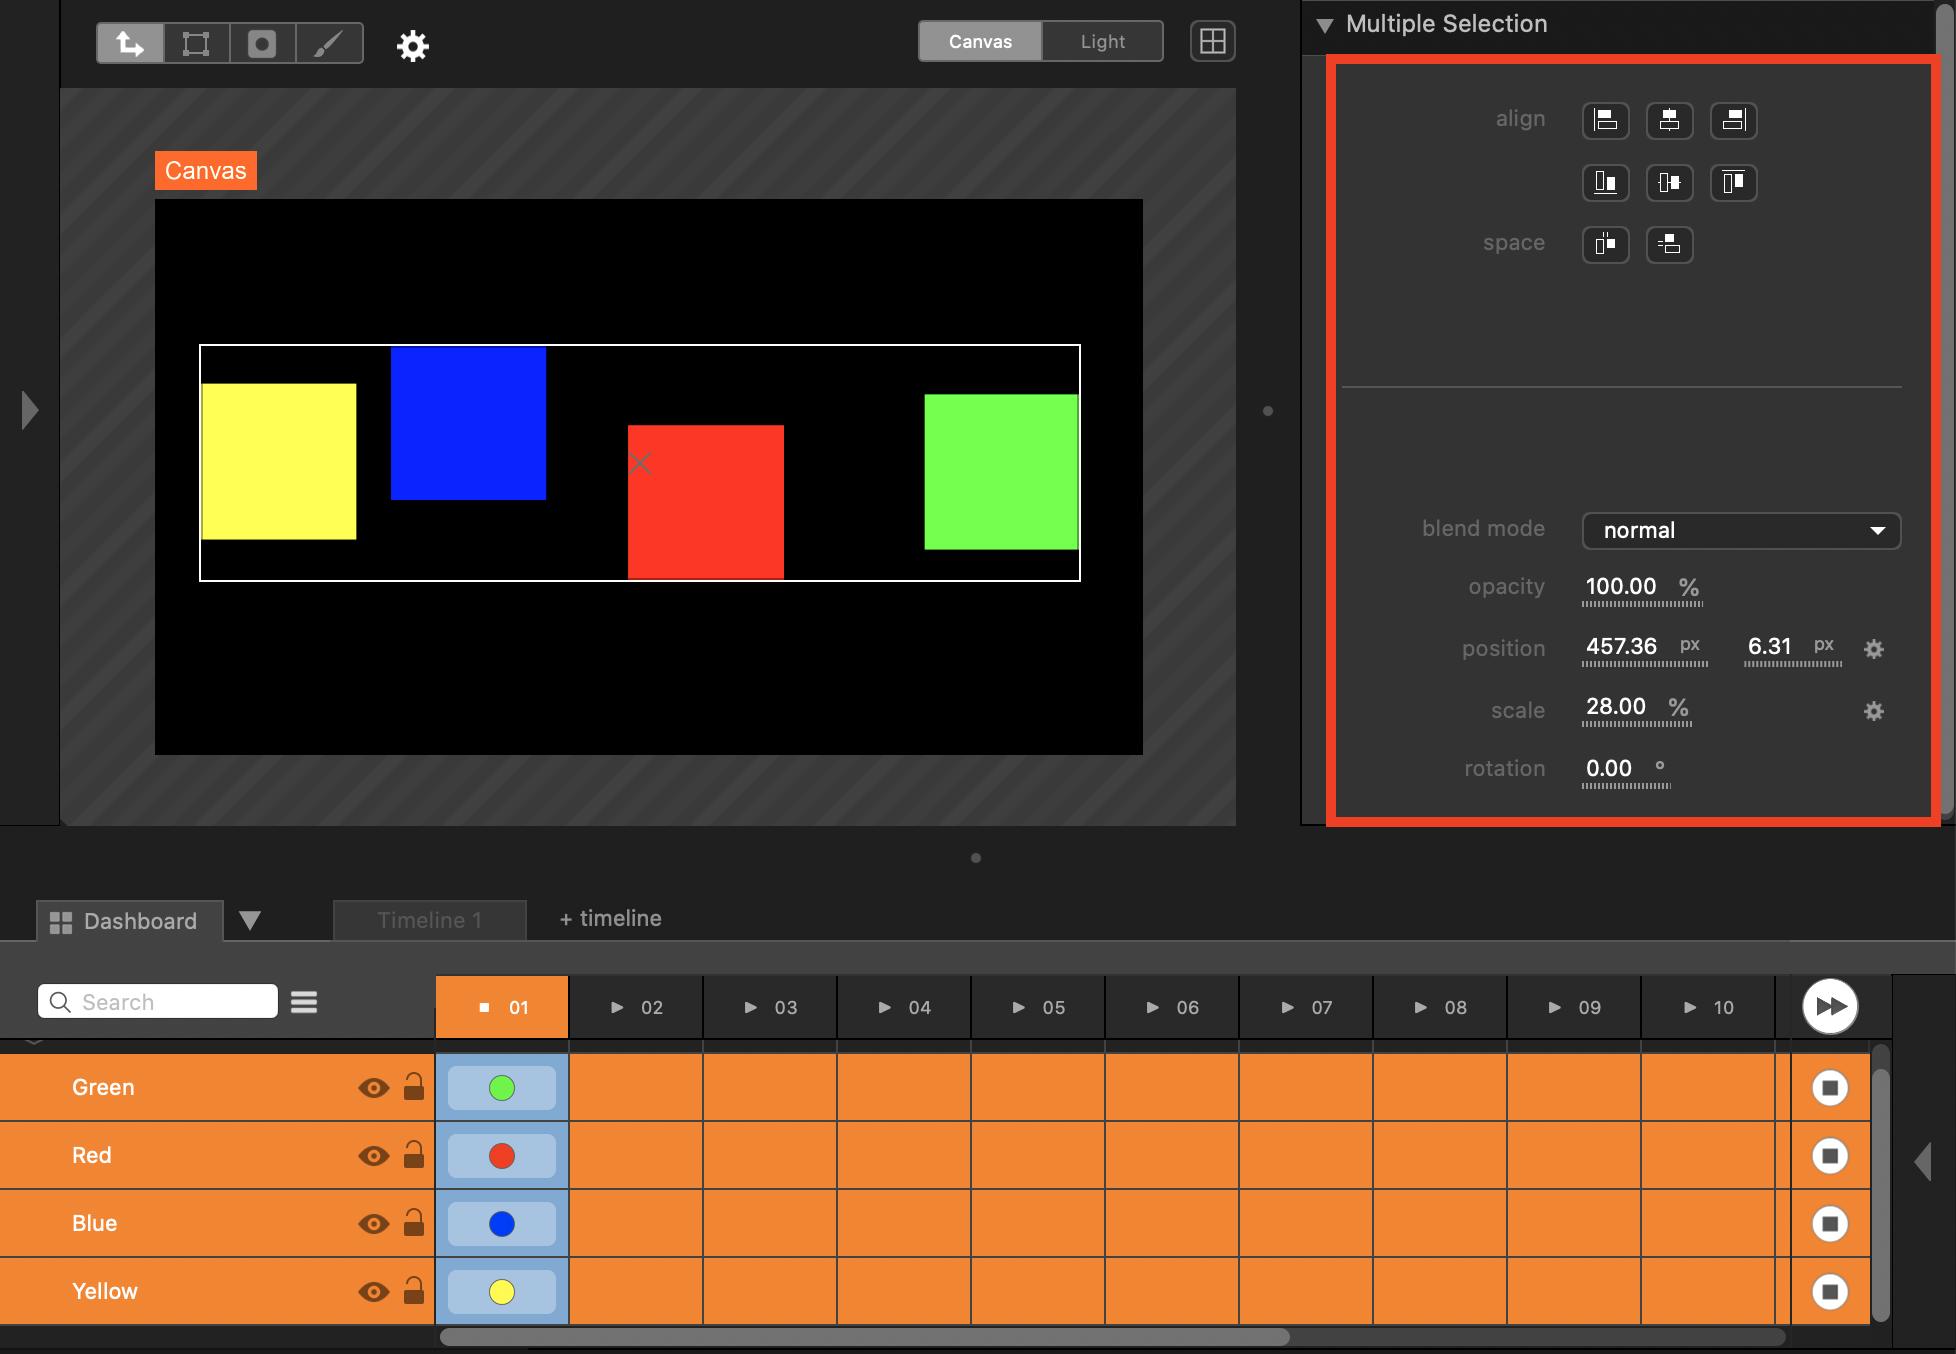
- align layers with each other
- set fixed content spacing between layers

Filter
You can organize your layers list by filtering them :
- filter by layer name via the
searchfield - filter by kind
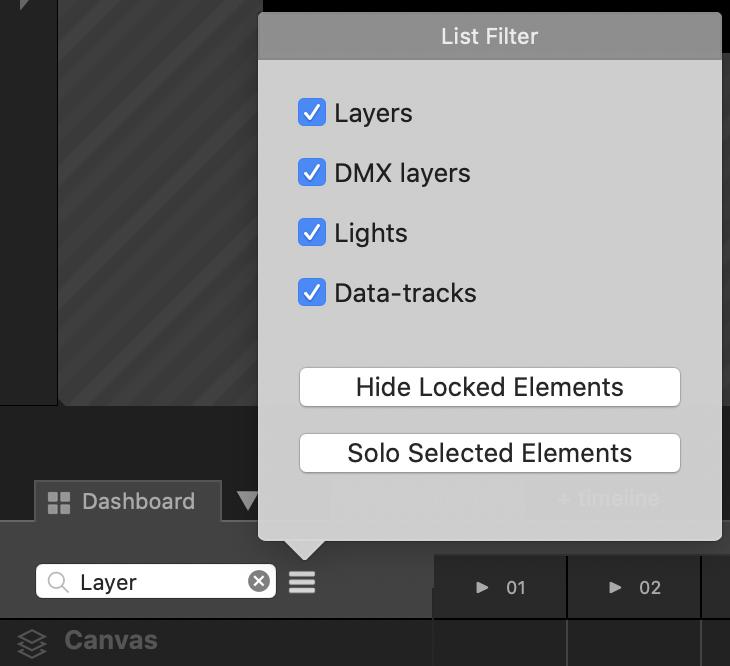
Solo Selected Elements affects the visibility of the layers, while the other options only affect the list of layers.